When in Quarantine, Give a Home Office Tour!
- Lauren Figueroa

- Apr 6, 2020
- 5 min read
Updated: Apr 13, 2023
Hello, my friends!
Here's hoping that by the time this posts, we're a little closer to getting back to our normal rhythms and no longer isolated in our homes...
But I have to say, I'm finding this whole quarantine thing rather helpful for getting that "deep creative work" done (sorry, not trying to rub it in your face if you suddenly find yourself at home with multiple kids while trying to get sh*t done...
I'm definitely feeling for all our friends with kids at home right now!). BUT, it's not every day that I get blocks of several hours to truly get into my design work, blogging, drawing, or whatever the creative task.

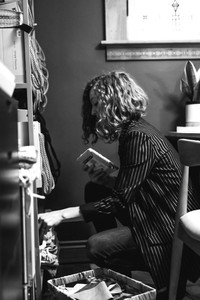
That said, I finished my design work for the day and decided to pick up my camera. I took photography back in high school, but that was vintage film cameras and dark rooms and all that jazz. Digital is hard! And I give so many props to my photographer pals—lookin' at you, Alyssa and Sydney!—because UG. Lighting is TRICKY.
I know just enough about cameras and photoshop to be dangerous...so I shot a mini home office tour to pass some of this quarantine time and mixed in a few pix from an earlier shoot for good measure (by the lovely Sydney Kamaloski) to give you a little peek into where I spend my days.
Let's do this!


Welcome to My Office!
My home office is just off the entry of our house. While it has a south-facing window, alas, we're just 6 feet away from the house next to us, so it gets about zero natural light.
Because of that, I've added lots of additional lamp lighting to the space, and ideally I'll add recessed lighting at some point as well. Currently, it can be pretty tricky to see true colors in this space, so I hope to add some picture lights over the bulletin board, and maybe others as well.
On the back wall is a giant corkboard. Depending on the stage of a project, the board will look pretty different.
In the early stages of a project, you'll see a collage of items, floor plans, fabric samples, and color swatches, that I arrange and rearrange as the project is progressing. When I'm getting close to presenting, I'll have mostly finished style boards tacked up.


The L-shaped desk semi DIY-ed. The taller desk was a Wayfair purchase, and I swapped out the original cheap MDF surface for a simple wood board from Lowe's.
The shorter side of the desk is the same wood board supported by two black Target file cabinets. This works great as an extra work surface, and gives me plenty of space to spread out, which I definitely need!
Above my desk to the right, I've hung a few wall-mounted file storage racks. These house files for active projects, and a few files that we need regular access to for the household.
Of course, a little pop of greenery on the desk is always a must for me, and then my go-to office supplies (tape, paper clips, pens, and scissors) are at the ready in a container on my desktop.


On the far right wall when you walk through the doors (below), I created a standing desk using what was intended to be a workbench for a garage or workshop.
I like that the desk ties in nicely with my current desks, and it's perfect for laying out samples of fabrics, tiles, paint colors, etc. when I'm working on projects. It's also nice to have the option to work standing since I spend so much time sitting at the computer.
Below the standing desk, I store a basket of hand-knotted rug samples and a bar height stool. Sometimes Larry works in here with me, and Sydney and I meet here regularly, so it's ideal to have additional options for seating in the event more than one person is working in here.

On the left, below the standing desk, is a vertical drawer organizer, which I use for storing project samples. The drawers are the perfect size for fabric swatches, paint sheets, tear sheets, and tile samples.
Each project gets one or two designated drawers, and when I'm not working on that particular job, I can pop everything in there to avoid clutter—which I loath!
Above the desk I have a handful of samples (two above) for a few of the product lines that I use regularly. I don't keep too many samples in my home library since we have limited space, but I like to have a few of my go-to finishes on hand so I'm not constantly borrowing the same few finishes from our design center over and over.
A few of these samples include a ring-set of wood finishes and leather swatches from my favorite upholstery line and bedding fabric swatches for my favorite duvet covers.

For the limited things I do need to store, I have two taller matching bookshelves (above). On these, I store additional office supplies, fabric books, more rug samples (I LOVE RUGS), and a few of my go-to countertop samples.
I also have a stack of project trays, which I use for client presentations. These are perfect for laying out and keeping the various samples organized, and you can designate a tray or two per room. They also stack nicely, making them easy to carry in and out of a presentation.

And of course, it's important to have one or two personal items in your office. For me, it's a photo with a note from Larry over on the standing desk, and a sweet photo of my nieces on the top of my bookshelves. They're pretty darn cute, if I do say so myself! Yes, curls DO run in the family, if you were wondering.
So this is where the magic happens! Let me know if you have any questions about my workspace, where things are from, or how any part of it functions, and share about your own personal work from home space below!
Hope you're staying well, friends!
Lauren Figueroa


Work with Lauren Figueroa Interior Design

LFID is a full-service interior design firm serving West and Southeast Michigan known especially for our Designed in a Day service.
We work with clients from Detroit to Novi to Clarkston, and Grand Rapids to Holland to Traverse City—and anywhere in between! We pride ourselves on creating bespoke, people-centered spaces—because after all, people are what this life is all about!


Comments